Front Desk Complete Guide: From Check-in to Check-out
Using the Virtual Front Desk
The Front Desk provides a visual workflow:
- Scheduled - Scheduled and Defaulted to Today (you can change date viewing) and change the Providers/Rooms viewing in the header bar of Front Desk
- Checked-In - You can push them back to scheduled as well as use Room Flow for further organization
- Checked Out - No Fee Slip or Claim was created
- Checked Out with Claim - Fee Slip Saved for DOS
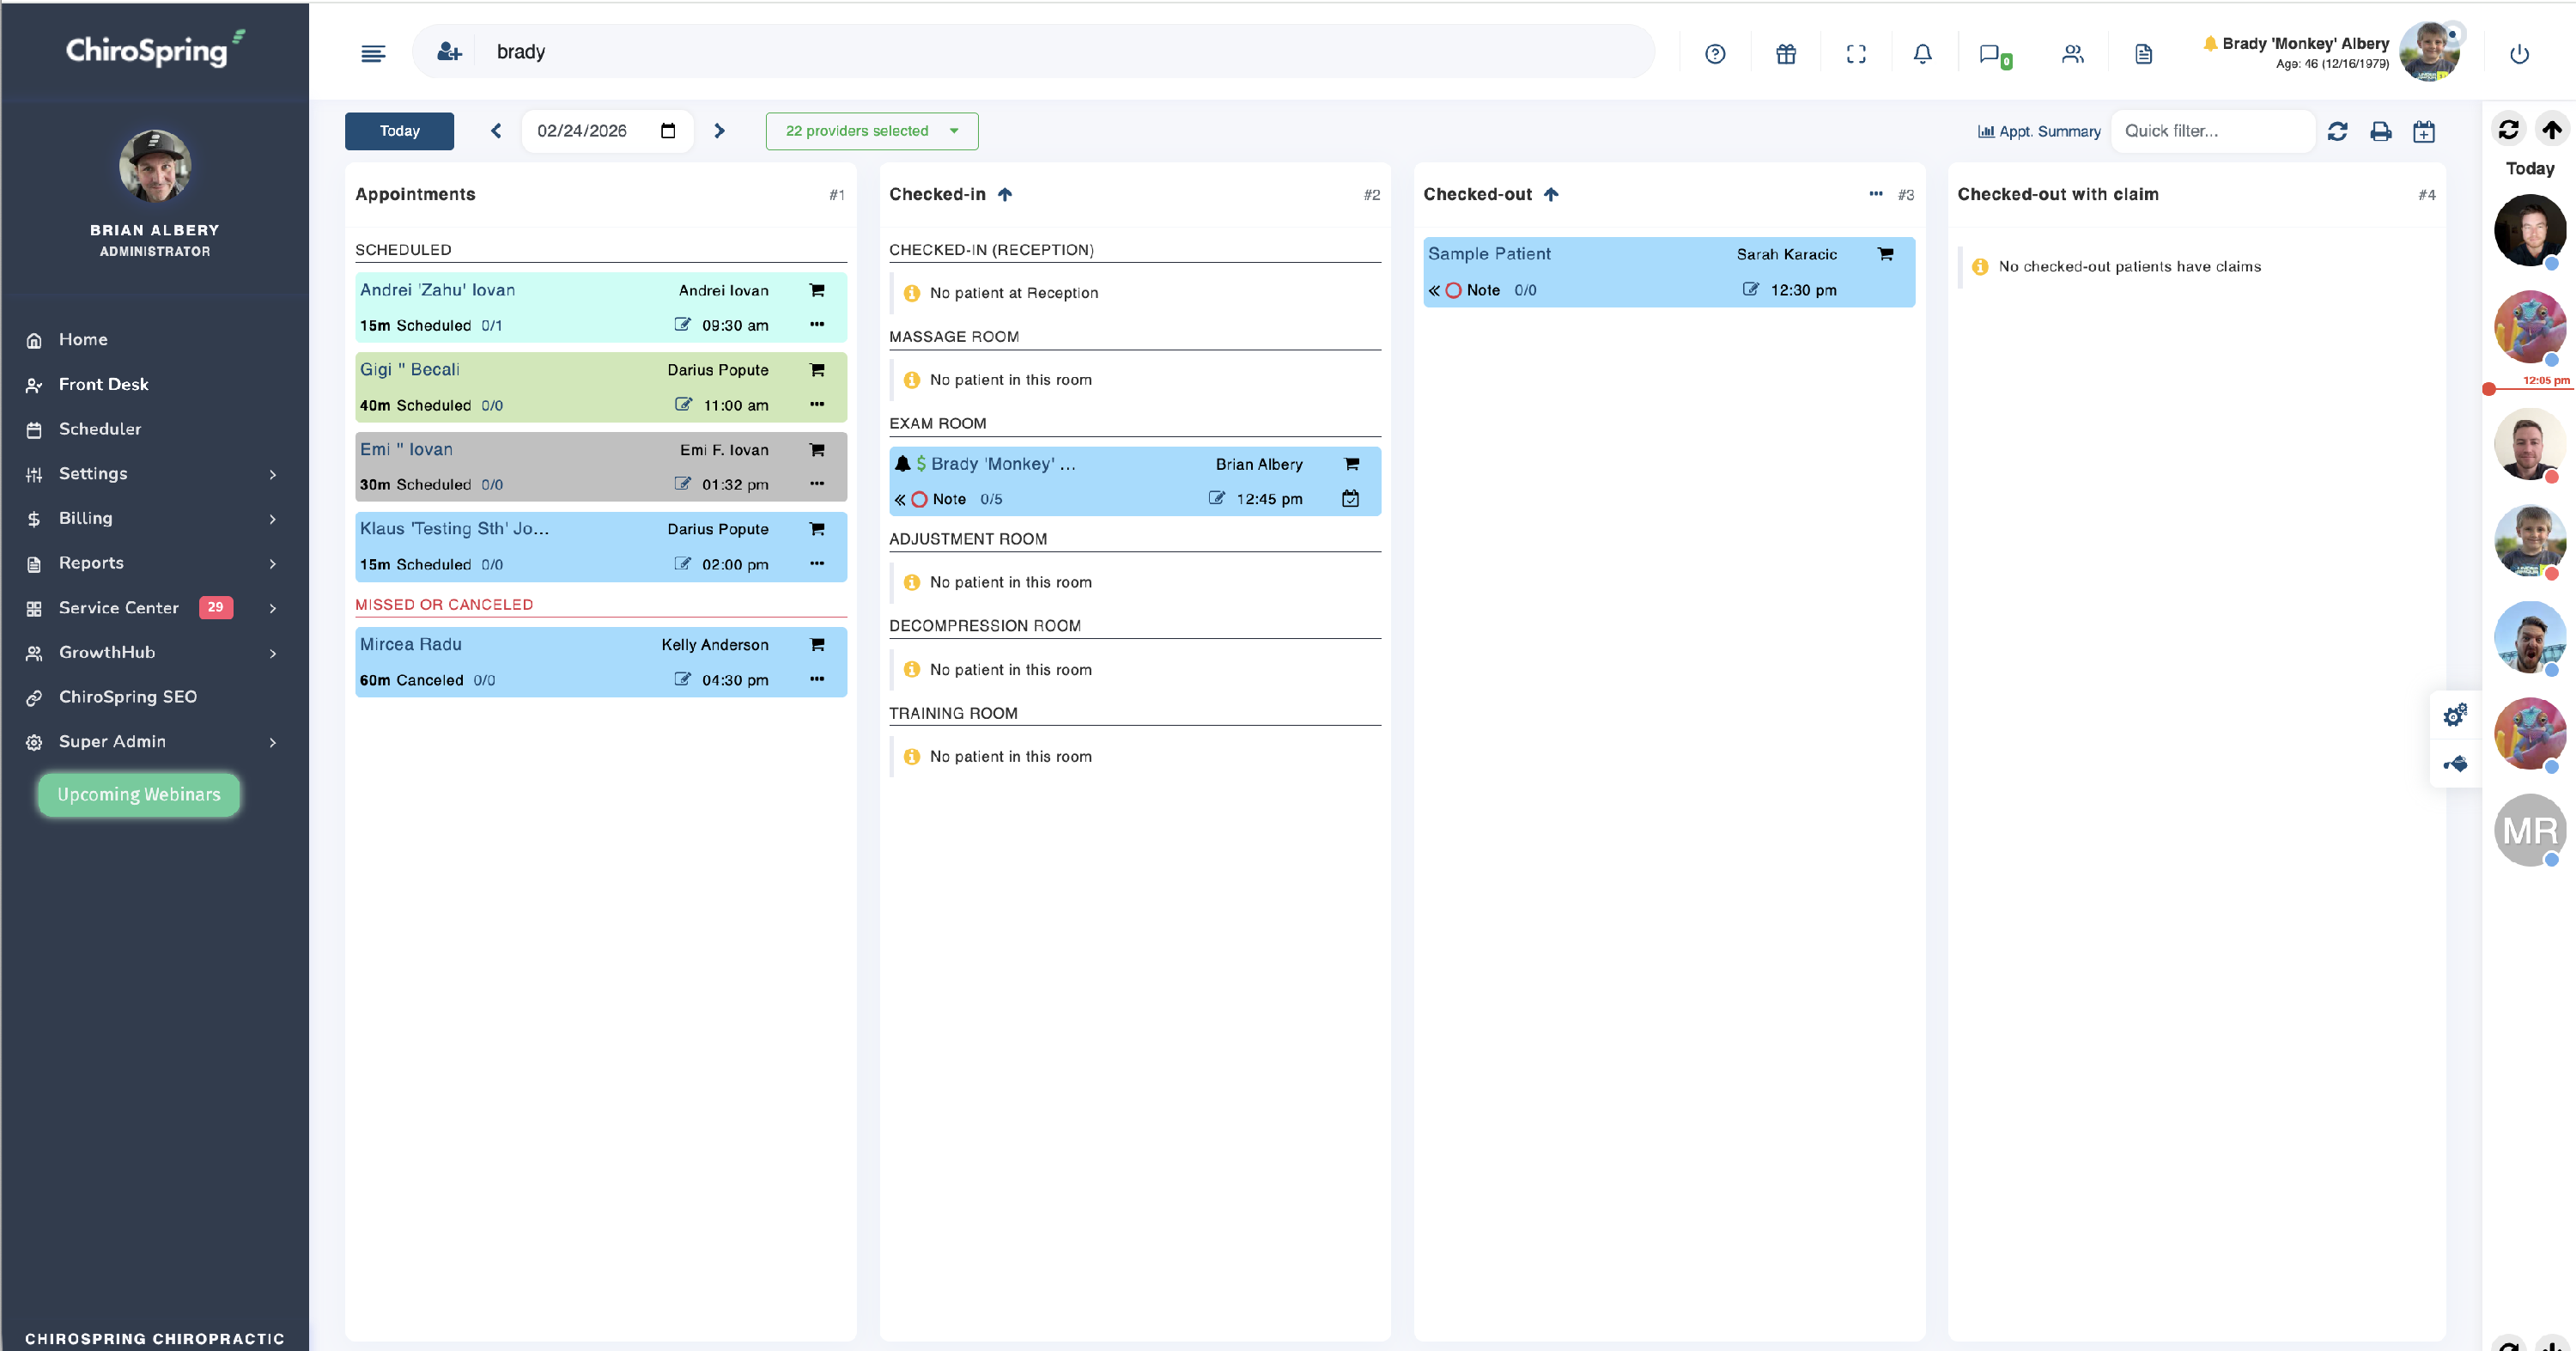
Front Desk Icons
- Dollar Sign Icon next to Patient Name - Payment was Collected this day
- The 0/1 tracker next to the (note) is a Form Tracker, forms completed of the forms due for this appointment
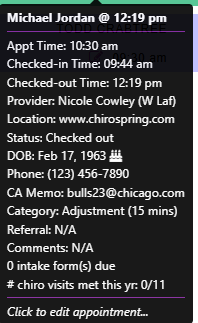
- The square with pencil icon you can hover to get a quick view of Patient Name,, Appt Time, Checked In Time, Checked Out Time, Provider, Location, Status, DOB, Phone, CA Memo, Category (Appt), Referral, Comments, Intake Due, Insurance Visit Tracker
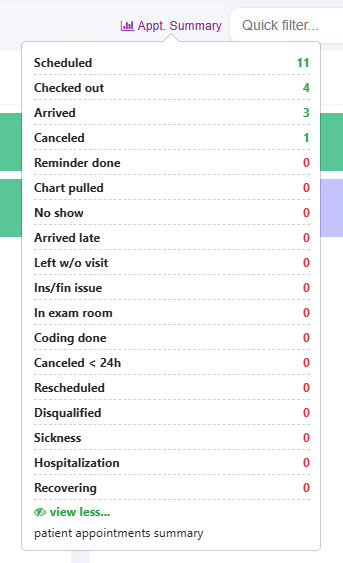
Metrics from Front Desk Screen
Appt Summary (NEW quick KPIs) - Click View More after opening to see all
Front Desk Quick Filters
- Search by
- patient name
- provider
- appointment category
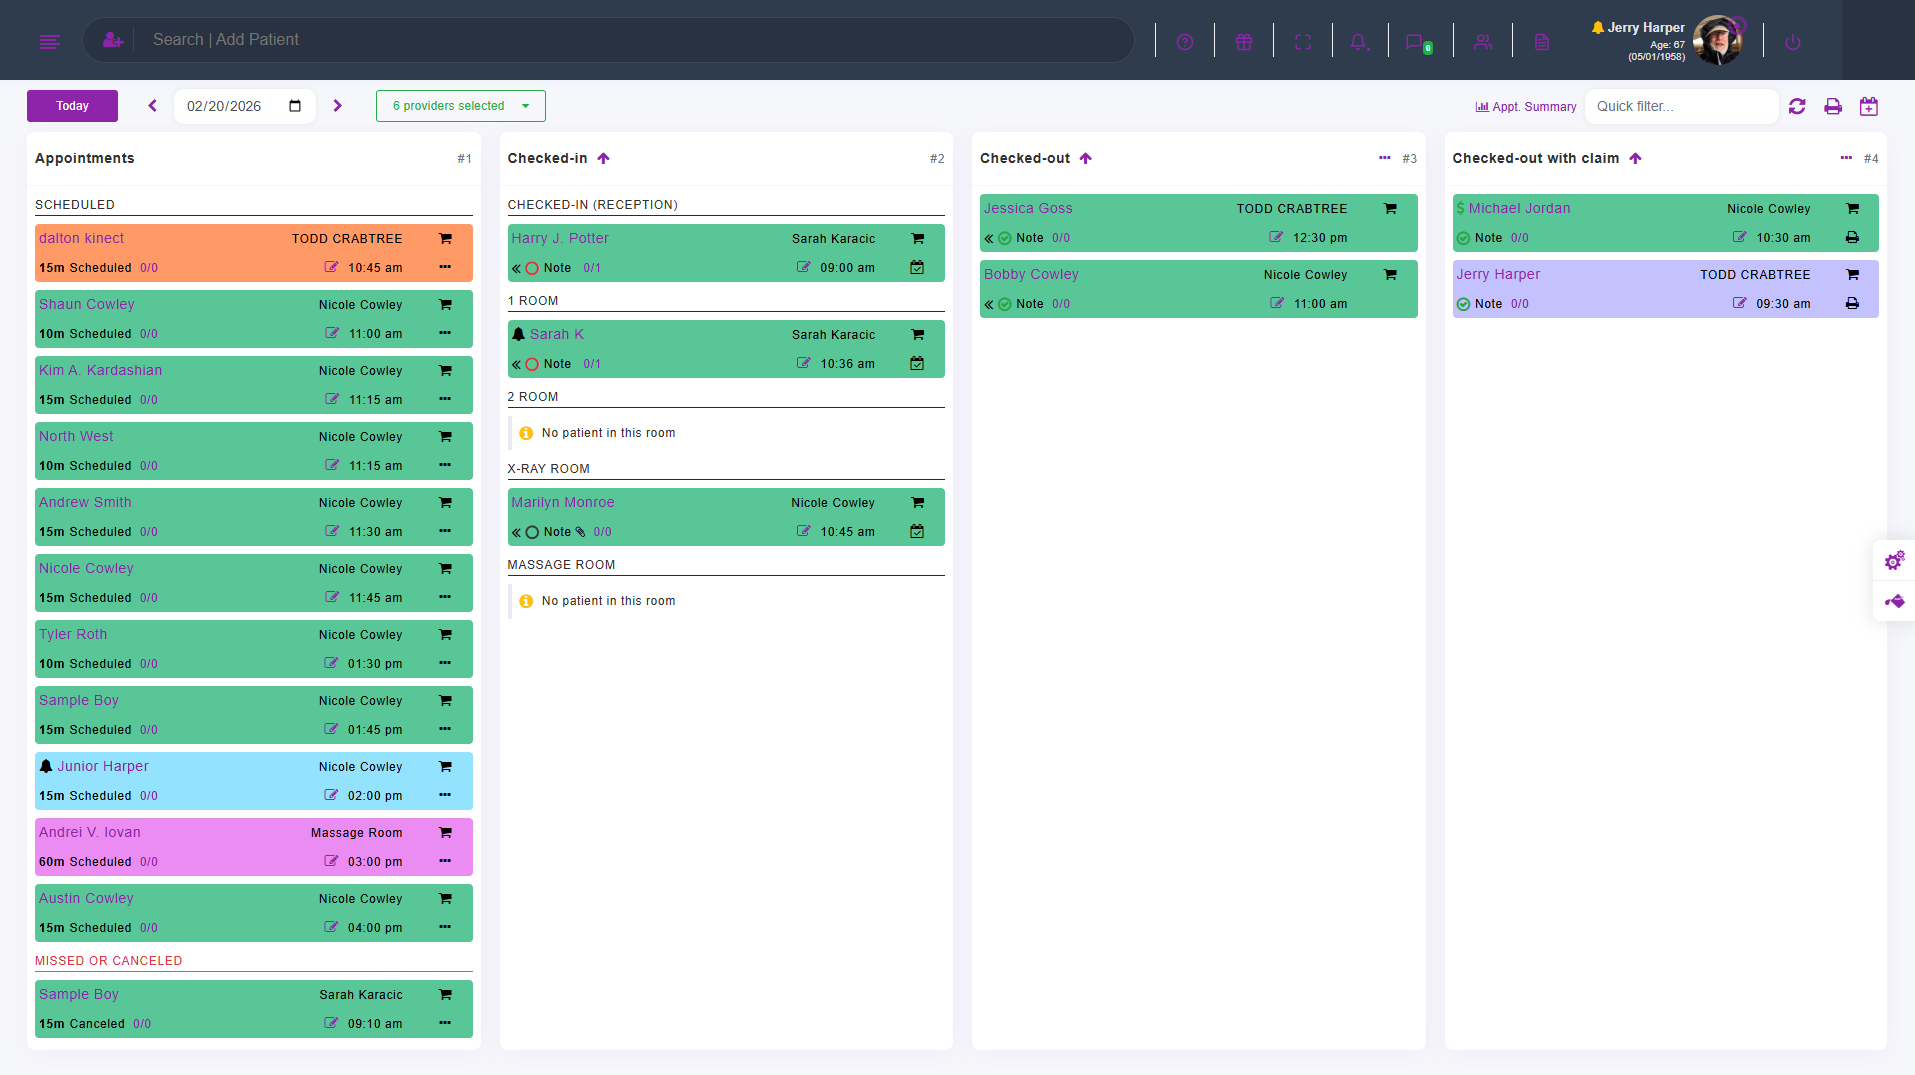
Room Flow - Patient flow on front desk
ChiroSpring's Front Desk is a great way to manage the flow of your patients from checked in all the way to checked out. For practices that are large, or require patients to occupy specific rooms, Front Desk supports creating virtual rooms.
See below for an example. As you can see there are three rooms:
- Treatment Room
- Massage Room
- Therapy Room

To enable room flow, go to settings/users & rooms.
Make sure 'Enable Room on the Front Desk Room Flow is toggled on.
You can set the order of the room (up or down) using the Order option. As an example, if you have option 2, this will be your second room.

Checking a Patient In
There are 3 ways to move a Patient From Scheduled to Checked In from Front Desk View
-
Automatically: If checked in from the Schedule, through Patient Mobile App, or Self Check In Kiosk: Checking a Patient In
-
By Dragging and dropping from Scheduled Column to Checked in Column
3. Clicking the arrows to manually move a patient from Scheduled to Check In
Starting Treatment Notes
- Click the empty note bubble to select a treatment template OR Click on the Patient Name to open the Patient Treatment Dashboard (in new tab)
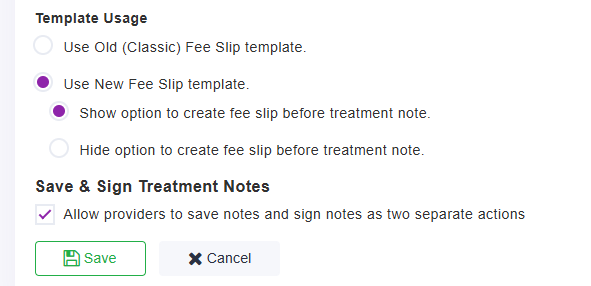
- Templates shown match your Treatment Note View Settings (Active on Patient Dashboard) turned on and order. You can find this in Settings - Treatment Notes - Notes & Fee Slip - Visibility tab
- You may see the option to Create a Fee Slip in your dropdown, you can turn this setting on/or. 360 does allow you to create a fee slip before or without a note saved or signed for offices that want that. Settings - Treatment Notes - Notes & Fee Slip - Note Settings
-
**Please remember to CLICK SAVE when done

Checking Out a Patient
You can:
- Create an appointment
- View or edit the next appointment
- Request a 5-star review
- Print a payment receipt
- Apply unapplied money to services or products
It functions as a complete front desk control center.
Click the Checkout icon to move a patient to the Checked - out or Check - out with claim OR Drag and Drop

From here you can:
- Take payment
- Apply unapplied funds
- Add products
- Create claims
- Reschedule appointments
- Send 5-star review requests (GrowthHub required)
Patients may also pay before their visit.
Claims & Payments
During checkout you can:
- Select claims/products to pay
- Edit payment amounts
- Add products
- Create new claims
- Apply unapplied payments automatically
Patients will move to:
-
Checked Out
or
- Checked Out with Claim
This helps identify missed claims.
Front Desk Check-Out Screen
Welcome to the enhanced checkout experience! Our new checkout screen for checked-out claims is designed to simplify your workflow by consolidating all necessary actions into one convenient place. Whether you're managing unpaid claims, processing payments, or scheduling appointments the new checkout screen is your one-stop solution.
Patient's Next Appointment
With the new Checkout Screen, you can effortlessly access information about the patient's next appointment. If no appointment is scheduled, the screen allows you to add a new appointment directly. For added convenience, you also have the option to open the scheduler in a new tab or page without navigating away from the checkout screen.


Claims and Products
Say goodbye to the hassle of navigating through multiple screens to find information about a patient's unpaid claims and products. Our new Checkout Screen provides a comprehensive overview, allowing you to quickly identify outstanding balances and items.

Add Products
Need to add product sale? No problem. The new Checkout Screen allows you to add products and collect total payments for both products and claims—all in one screen.
Unapplied Payments
Our system identifies unapplied payments and provides you with the option to use and auto-apply to relevant claims.

Request Patient Review
Easily request patient reviews to amplify your practice's online presence.

Accept Payments
The enhanced Checkout Screen empowers you to accept payments for selected claims and products. Making it quick and efficient for both you and your patients.
