From Setup to Success- ChiroSpring Go-Live Guide
This guide is designed to help you easily navigate ChiroSpring on your first day live with the software. It is organized into three sections: Before Day 1, Day 1, and End of Day 1. This comprehensive guide covers Front Desk, Provider, and Billing features. We recognize that each practice has its own workflow, which is why ChiroSpring provides a variety of features designed to meet the specific needs of your practice—making things simpler and more seamless for you and your team! 😄
Get Support:
Reach our Support team by emailing service@chirospring.com, calling +1 888-426-0007, or navigating to our customized ChiroSpring Knowledge Base to view existing Help Articles & More:

Data Migration:
If you've signed up for Data Migration, schedule your Migration Discovery Call about 1 week before your go-live date by emailing service@chirospring.com. Verify accuracy using this guide 🡺 Data-Conversion-how-to-verify-accuracy
Before Day 1
💡We suggest reviewing the following items prior to your first day
1. Import Data: If you did not sign up for a Data Migration, use our import tool to import data like patient demographics, credits, balances, or products. 🡺 Import Patient Demographics, Import Product List, Import Patient Credits, Import Patient Balances

2. Patient Files- To bring over existing patient files you can use the Import Tool previously mentioned, or if applicable, check with the Data Migration team if these will be brought over for you during the migration process. If not, you will need to enter this information. *Ensure each file has a "Main Phone" AND "SMS Phone". The main number will be used for Insurance billing and SMS phone for all texts from your practice to the patient (reminders, confirmations, etc.)
*You can edit any patient file by navigating to the patient "Billing Dashboard"
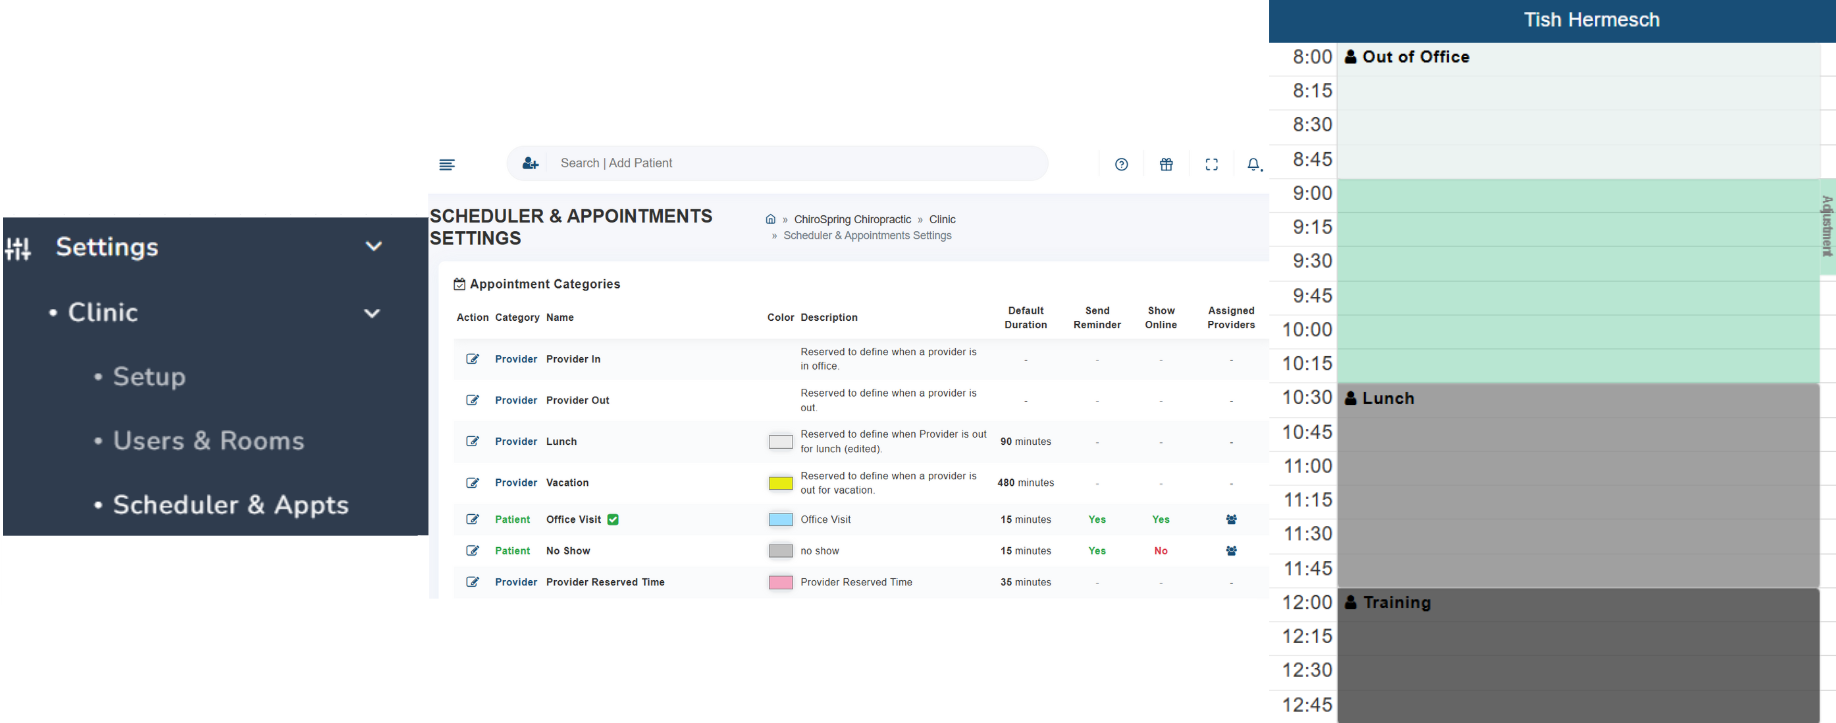
3. Scheduler: Appointment Categories, Time Blocks, and Practice Hours - Ensure your scheduler has the appropriate blocks in place to display your practice hours and appointment time blocks. Add your full list of Appointment Categories into the system, too! For setup help, refer to the article linked, or your training recordings 🡺Appointment Settings & Scheduler
4. Patient Intake Forms - Make sure you have set up/customized intake forms you plan to use, and also assigned them to any appointment category you want the forms to automatically be assigned for! 🡺 Digital Patient Intake Forms
5. Service Fees & Price List, or "Fee Schedules": Before your first day live, you will want to be sure your price list is set up with the services/prices you offer! 🡺Edit your Service List and Fees / Create Custom Procedure Codes
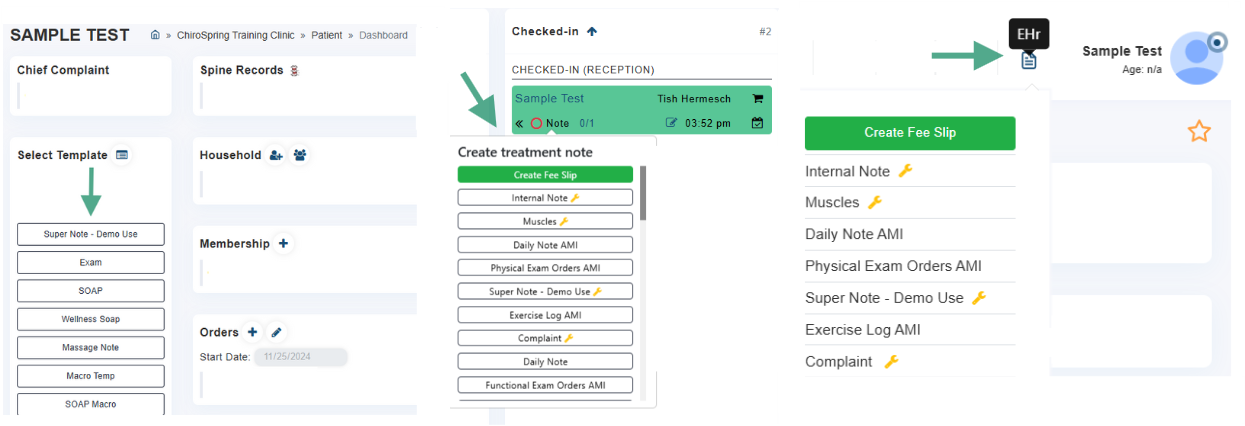
6. Note Templates: Take time to build and/or edit your treatment notes & familiarize yourself with the template you plan to use on Day 1. *You can access all predefined templates and edit them by going to Settings > Custom Templates > Build Template (in Step 3 choose "Predefined Templates") 🡺 Customize Treatment Note
*You can also customize your "EHR Menu" or template list. 🡺 Customize Template List/ EHr Menu
7. Users & rooms- Ensure all of your employees have access to the system! You can add new users by going to Settings > Clinic > Users & Rooms. Everyone should be able to login to the system prior to Day 1 by going to: login.clinicdr.com. Review this article for how to add new users: 🡺 Add Users
8. SMS Settings- Work Flow Rules: If you plan on using Appointment Reminders and/or Confirmations feature, make sure you set these up under Work Flow Rules 🡺 Appointment Reminders
9. ChiroSpring pay- (Once Approved/If Applicable) Run a test payment to make sure your ChiroSpring Pay and terminal are functioning. 🡺 ChiroSpring Pay Activation / Video: How to Use ChiroSpring Pay
10. Third Party Payers- If your Third Party Payers were not brought over in a Data Migration, you will need to enter them and configure the procedure allowances for each payer under Billing > Settings > Third Party Payers 🡺 Add Third Party Payers
11. Insurance Information/Verifications- If the patient insurance information was not brought over during a Data Migration, you will need to enter the Insured Information and Verifications- this will allow for the Patient Member Responsibility (PMR) to calculate accordingly & assist your front desk with accurate patient balances during checkout: 🡺Insurance Verification , Patient Membership Responsibility
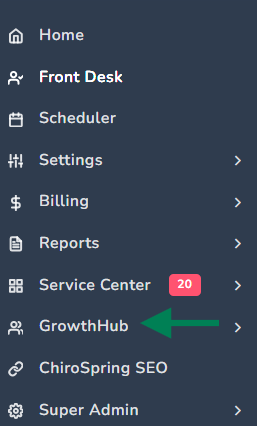
12. GrowthHub (If applicable)- Depending on your GrowthHub subscription (basic or pro) you have a variety of features to choose from that you may find useful on your first day. Such as, broadcast messaging, or utilizing the automated 5-star review requests. Familiarize yourself with what features you have available and if you plan on using any of them on Day 1, now is the time to set those up! 🡺 GrowthHub Features
Day 1 Live:
💡These are key features you will likely use on your first day
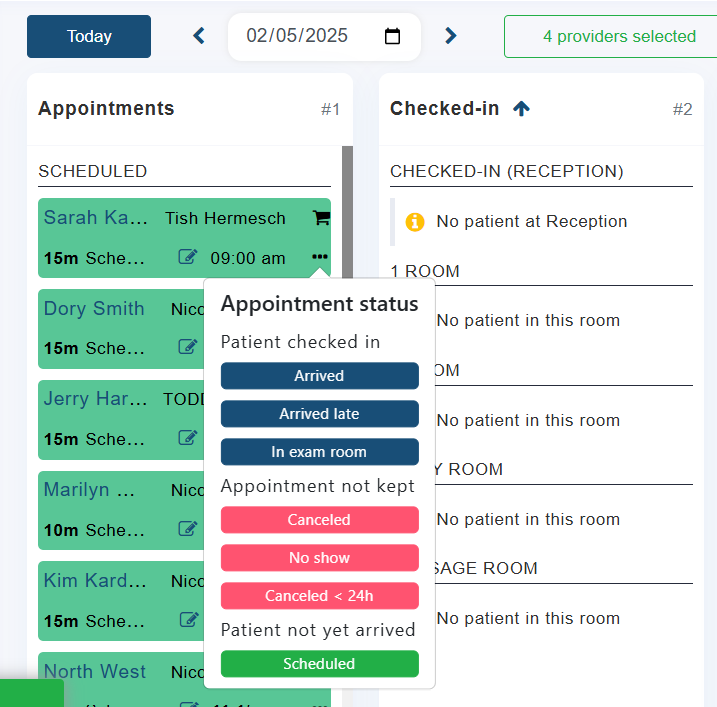
Front desk: On Day 1, you will likely use the following features: Check in/Out, Take payment, Schedule next appointment. You can reference your Front Desk Training recording or the following article: 🡺 Using the Front Desk.
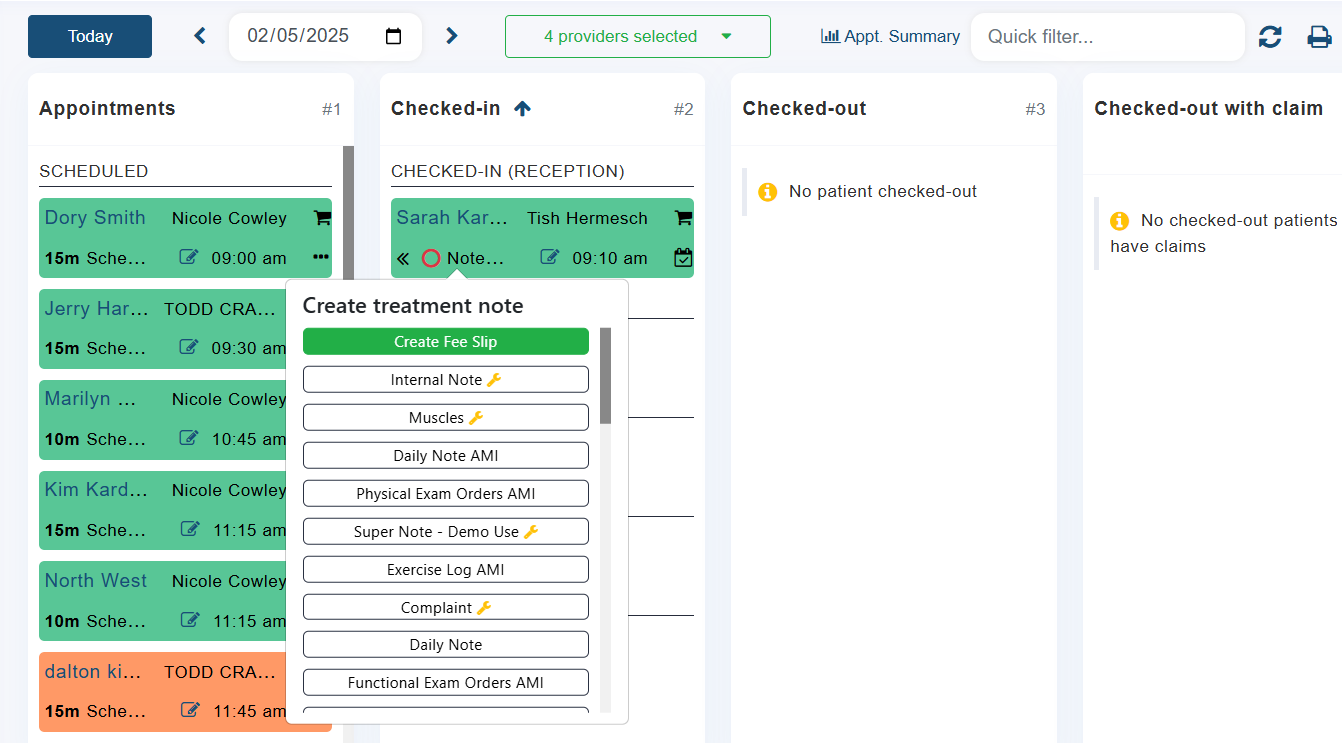
Providers: Day-to-day, providers will mainly focus on creating the Treatment Note and Fee Slip. Here's a couple videos that show you how to initiate those 🡺 Provider Training Videos
End of Day 1:
💡Two reports you can use to reconcile at the end of your first day
To reconcile for Day 1 collections, notes, claims etc. there are a few reports we recommend utilizing. These can all be found under the "Reports" tab in ChiroSpring.
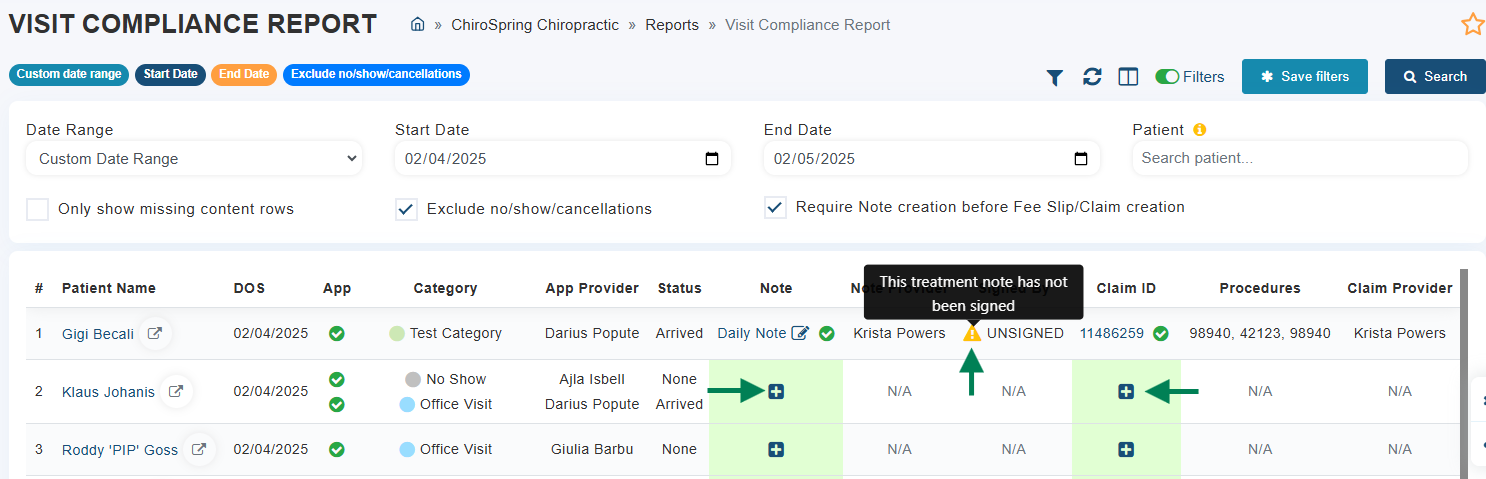
- Visit compliance Report - Can be used to track unsigned notes, missing fee slips, and so much more! Go to Reports > Visit Compliance.
- You will see a few different icons that indicate if there is either no note, no claim, or an unsigned note. You can use the "+" buttons to create items, or click on the note name or claim ID to view existing ones.
- Activity report - This report can be used for total collections, you can run this report by two different algorithms, Activity or Post date. Here's a description of each 🡺 Activity Report Algorithm
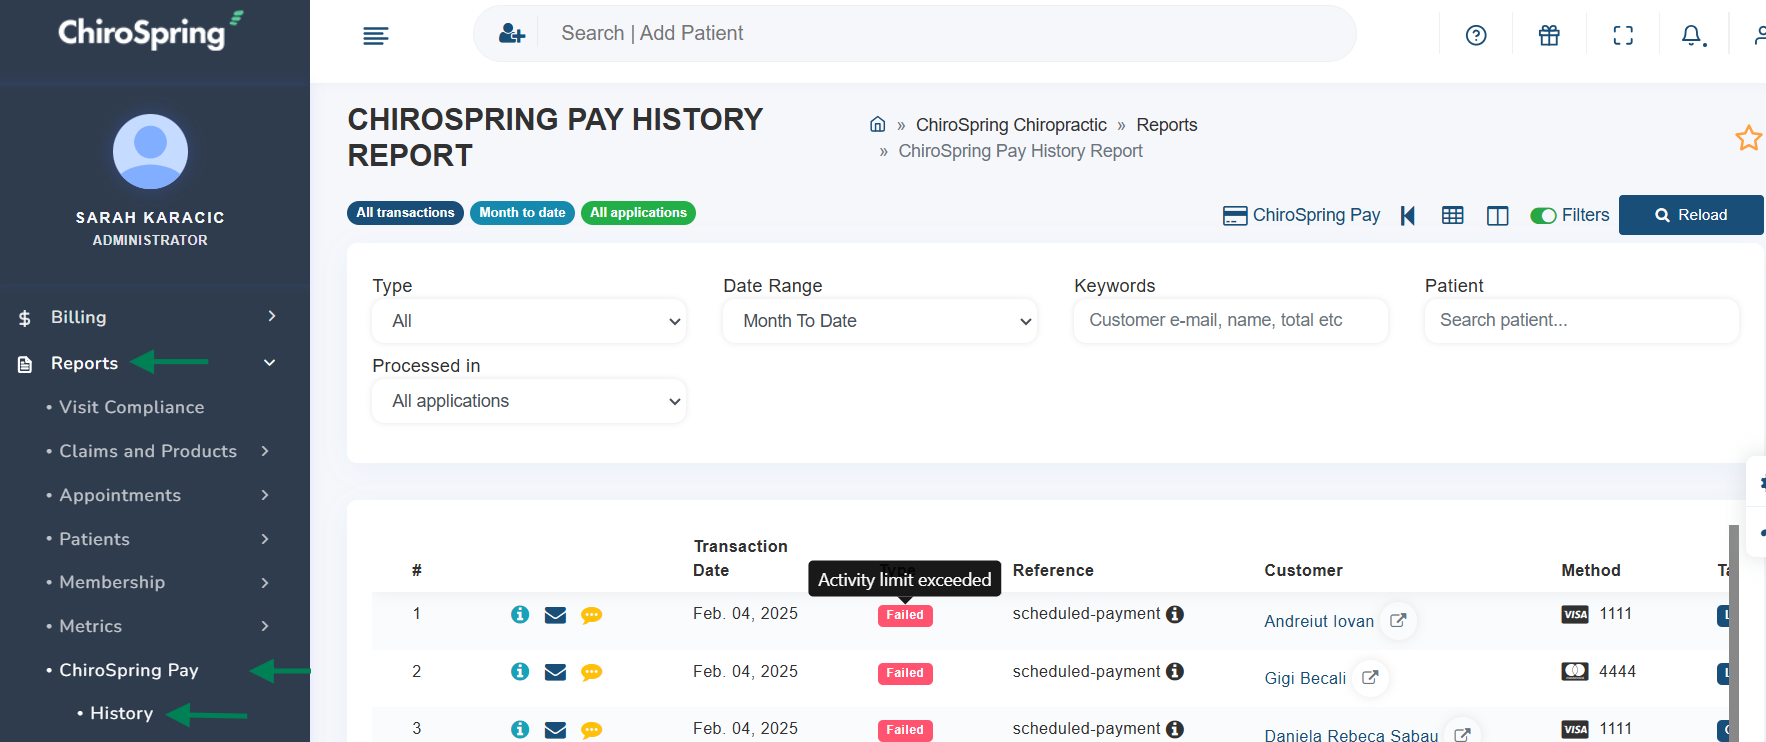
- ChiroSpring pay history report - This report will reflect all Credit Card payments taken using ChiroSpring Pay. Go to Reports > ChiroSpring Pay > History.